How to Set Up Nginx Proxy Manager on a VPS for Secure Reverse Proxying
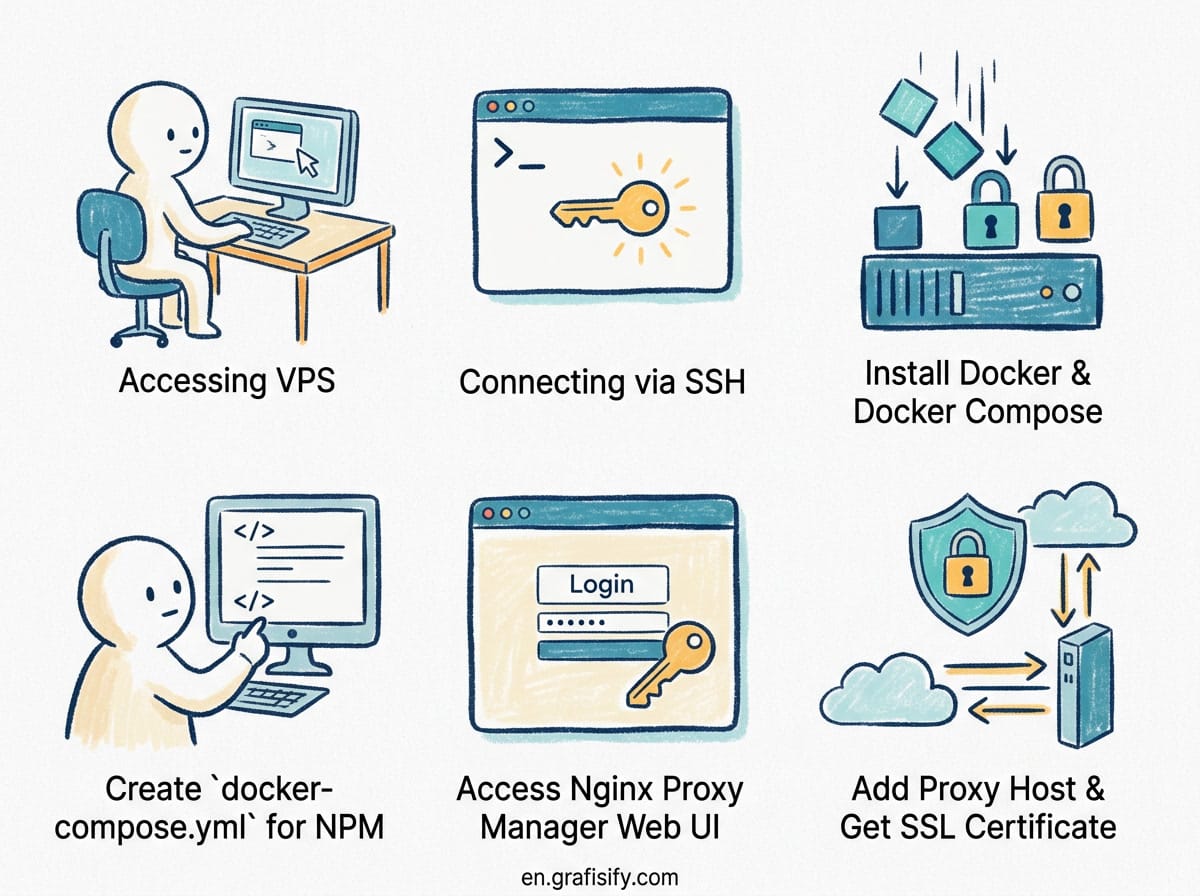
Verdict Cepat / TL;DR: Setting up Nginx Proxy Manager (NPM) on your VPS gives you a clean web dashboard to manage reverse proxies, automatic Let’s Encrypt SSL certificates, and custom subdomains without touching raw NGINX configuration files. By running NPM inside Docker Compose alongside a shared container network, you can route domain traffic directly to your backend services securely with zero downtime.
Why Use Nginx Proxy Manager on Your VPS
If you run multiple web applications, Docker containers, or self-hosted tools on a single Virtual Private Server (VPS), exposing them directly through open public ports is bad security practice. Running services on non-standard ports like 8080, 9000, or 3000 leaves your infrastructure cluttered and vulnerable. Raw NGINX virtual host files solve this, but editing configuration blocks by hand for every new subdomain quickly becomes tedious and prone to syntax errors.
Nginx Proxy Manager bridges this gap. It wraps a full NGINX reverse proxy engine in a sleek, lightweight web interface. With NPM, pointing app.yourdomain.com to an internal Docker container takes under thirty seconds. It handles automatic SSL renewal via Let’s Encrypt, HTTP to HTTPS redirection, access control lists, and custom location headers with a few clicks.
When combined with Docker, NPM acts as the single gateway for your entire server. Instead of exposing five different ports on your public IP firewall, you keep port 80 and 443 open for NPM and keep all backend container traffic strictly on an isolated internal network.
Also Read:

Prerequisites and Server Requirements
Before installing Nginx Proxy Manager, ensure your VPS setup satisfies these basic requirements:
- Operating System: Ubuntu 22.04 LTS or Ubuntu 24.04 LTS (Debian 12 also works seamlessly).
- Resource Requirements: At least 1 GB of RAM and 1 CPU core. NPM itself consumes under 150 MB of memory.
- Domain Name: A registered domain name with access to its DNS management dashboard (Cloudflare, Namecheap, DigitalOcean DNS, etc.).
- Docker & Docker Compose: Docker Engine installed and running. If you haven’t set up Docker yet, follow our step-by-step tutorial on how to set up Docker on a VPS with Portainer.
- Open Firewall Ports: Ports 80 (HTTP) and 443 (HTTPS) must be open in your cloud provider firewall (Security Groups) and UFW.
Step 1: Configure DNS Records for Your Subdomains
Before launching NPM, configure your domain’s DNS settings so traffic reaches your VPS IP address. Log into your DNS provider and add two primary records:
- A Record (Root or Main App): Host
@pointing to your VPS public IPv4 address (e.g.,192.0.2.1). - Wildcard A Record (Subdomains): Host
*pointing to the same VPS public IPv4 address (e.g.,192.0.2.1).
Using a wildcard record (*.yourdomain.com) ensures that any new subdomain you create later (like analytics.yourdomain.com or dashboard.yourdomain.com) immediately routes to your server without waiting for DNS propagation.

Step 2: Create the Shared Docker Network
To let Nginx Proxy Manager forward traffic to other Docker containers by service name instead of host ports, all containers must share an internal Docker network. Create a bridge network called proxy-network by running this command in your terminal:
docker network create proxy-networkThis isolated bridge network acts as a virtual switch. Containers attached to proxy-network can communicate with each other securely over internal hostnames without publishing their ports to the public internet.
Step 3: Deploy Nginx Proxy Manager via Docker Compose
Create a dedicated directory for NPM on your VPS and create a docker-compose.yml file:

mkdir -p ~/npm && cd ~/npm
nano docker-compose.yml
Paste the following production-ready Docker Compose configuration:
version: '3.8'
services:
  app:
    image: 'jc21/nginx-proxy-manager:latest'
    container_name: nginx-proxy-manager
    restart: unless-stopped
    ports:
      - '80:80'
      - '81:81'
      - '443:443'
    volumes:
      - ./data:/data
      - ./letsencrypt:/etc/letsencrypt
    networks:
      - proxy-network

networks:
  proxy-network:
    external: true
Save and exit the editor. Launch the stack in detached mode:
docker compose up -dVerify that the container is running smoothly by checking the status:

docker psStep 4: Initial NPM Login and Admin Security
Once the container is running, open your web browser and navigate to your VPS IP address on port 81 (the administration console):
http://YOUR_VPS_IP:81Log in using the default administrator credentials:
- Email:
[email protected] - Password:
changeme
Immediately upon your first login, NPM will force you to enter a valid admin email address and create a strong, custom password. Complete this step straight away to secure your administrative dashboard.

Step 5: Adding Proxy Hosts and Issuing Free Let’s Encrypt SSL Certificates
Now that NPM is active, you can proxy incoming web traffic to any container or backend service. Here is how to route a domain to a web app with automated SSL:
- In the NPM dashboard, click on Hosts in the top navigation bar, then select Proxy Hosts.
- Click the Add Proxy Host button in the top right corner.
- In the Details tab:
- Domain Names: Type your target domain (e.g.,
app.yourdomain.com) and press Enter. - Scheme: Choose
http(orhttpsif your backend requires it). - Forward Hostname / IP: Type the internal container name (e.g.,
my-web-app) if attached toproxy-network, or172.17.0.1(Docker gateway) for host services. - Forward Port: Enter the internal port your backend app listens on (e.g.,
3000). - Check Block Common Exploits and Websockets Support.
- Domain Names: Type your target domain (e.g.,
- In the SSL tab:
- Select Request a new SSL Certificate under the SSL Certificate dropdown.
- Check Force SSL and HTTP/2 Support.
- Enter your email address for Let’s Encrypt expiration notifications.
- Agree to the Let’s Encrypt Terms of Service.
- Click Save.
NPM will validate the domain ownership via HTTP-01 challenge, issue a free SSL certificate, write the NGINX configuration automatically, and reload the proxy engine in seconds.
Comparison: Raw NGINX vs. Nginx Proxy Manager vs. Caddy
| Feature | Raw NGINX | Nginx Proxy Manager | Caddy Server |
|---|---|---|---|
| Management Interface | CLI / Config files | Web GUI + API | CLI / Caddyfile |
| SSL Automation | Manual (Certbot CLI) | Automated (Click GUI) | Automated (Built-in) |
| Resource Usage | Extremely minimal (<30 MB) | Lightweight (<150 MB) | Minimal (<50 MB) |
| Docker Integration | Manual static IP mapping | Docker network DNS support | Requires plugin / labeling |
| Access Control Lists | Manual htpasswd / auth directives | Built-in GUI ACLs & Basic Auth | Caddyfile block rules |
| Learning Curve | Moderate to High | Very Low | Low to Moderate |
Securing Your Proxy Setup: Access Control and Firewalls
To ensure maximum security for your reverse proxy infrastructure, apply these three essential protection layers:
1. Restrict Admin Port 81 in UFW
Port 81 should never be accessible to the public internet. Block port 81 publicly and only allow access from your specific home/office IP address:
sudo ufw deny 81/tcp
sudo ufw allow from YOUR_HOME_IP to any port 81 proto tcp
Alternatively, you can create a Proxy Host inside NPM itself for npm.yourdomain.com pointing to 127.0.0.1:81 with SSL enabled, and close port 81 in your firewall entirely.
2. Use Built-in Access Control Lists (ACL)
For sensitive backend tools like database viewers or administrative dashboards, navigate to Access Lists in NPM. Create a rule requiring HTTP Basic Auth username/password credentials or whitelist specific client IP subnets before traffic ever touches the backend container.
3. Hide Internal Backend Container Ports
When writing docker-compose.yml files for your backend applications, do not publish ports to host interfaces (avoid ports: - "8080:8080"). Instead, assign the container to proxy-network without port mapping. NPM will communicate with it internally, keeping public access restricted exclusively to ports 80 and 443.
Troubleshooting Common Issues
Here are quick solutions to common issues when running Nginx Proxy Manager:
- Internal Server Error (502 Bad Gateway): The forward hostname or IP is wrong, or the target container is not on
proxy-network. Verify container connection withdocker network inspect proxy-network. - Let’s Encrypt Certificate Failed: Port 80 is blocked by your firewall, or DNS records haven’t propagated. Confirm port 80 accessibility using
curl -I http://yourdomain.com. - Websocket Connections Dropping: Enable the Websockets Support toggle in the Proxy Host Details tab inside NPM.
CTA / Summary
Running Nginx Proxy Manager on a VPS simplifies self-hosting and server management. By pairing Docker Compose with NPM’s visual management interface, you gain absolute control over subdomains, internal container routing, and SSL certificates with minimal maintenance overhead.
Ready to build a complete homelab or server stack? Pair this setup with our guide on cloud storage choices for tech users or check out our comparison on OLED vs IPS vs Mini-LED displays to choose the right workstation gear.

Irfan is a Creative Tech Strategist and the founder of Grafisify. He spends his days testing the latest AI design tools and breaking down complex tech into actionable guides for creators. When he’s not writing, he’s experimenting with generative art or optimizing digital workflows.






 Artificial Intelligent
 Design & Creative
 Freelance
 Gadgets & Gear
 Insights
 Laptop
 Reviews
 Smartphone
 Tech Guides
 Vibe Coding