How to Set Up Docker on a VPS and Manage Containers with Portainer
How to Set Up Docker on a VPS and Manage Containers with Portainer
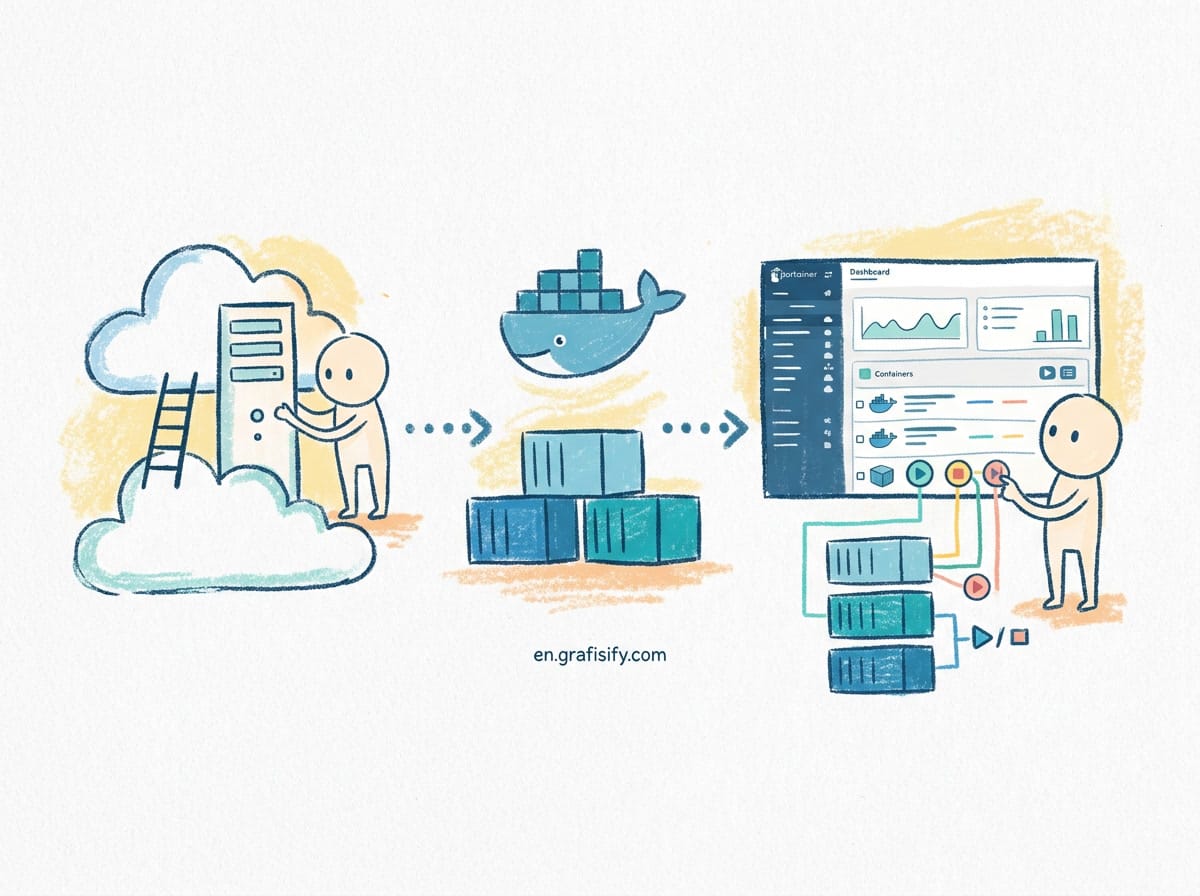
You rented a VPS. You SSH in. Now what? The screen stares back at you with a fresh Ubuntu prompt and no clear next move. Docker turns that blank slate into a deployment platform where every service runs in its own isolated container. Add Portainer on top, and you get a web dashboard that shows you exactly what’s running without memorizing a dozen CLI flags.
This guide walks through installing Docker Engine on Ubuntu, configuring it for production use, and deploying Portainer for visual container management. Whether you run a side project, a client site, or your own infrastructure, this setup gives you a solid starting point.
Why Docker on a VPS Instead of a PaaS
Platform-as-a-service options like Heroku, Railway, or Render abstract away server management. You push code, they handle the rest. The tradeoff is cost. A single hobby dyno on Heroku runs $7 per month for 512 MB RAM. A comparable VPS from DigitalOcean, Linode, or Vultr costs $6 for 1 GB RAM with double the CPU allocation. At the $12 tier, you get 2 GB RAM and dedicated vCPUs.
Docker on a VPS also gives you full control. You decide the networking rules, the storage backend, the log rotation policy. No platform-enforced memory limits on background workers. No surprise pricing when your app crosses an arbitrary usage threshold.
The tradeoff is operational overhead. You maintain the server, apply security patches, and handle backups. But for a developer comfortable with the terminal, the savings and flexibility outweigh the extra hour per month of maintenance.
Prerequisites: What You Need Before Starting
Before installing Docker, make sure your VPS meets these requirements:
- Ubuntu 22.04 or 24.04 LTS (recommended). Debian 12 works too.
- At least 1 GB RAM. 2 GB is comfortable for 3-4 containers.
- Root or sudo access. Docker Engine needs kernel-level permissions.
- A non-root user with sudo privileges. Never run Docker as root for daily operations.
- SSH key-based authentication configured. Password login should be disabled on the server.
The commands in this guide target Ubuntu but work on Debian with minor changes to the package repository URL.

Installing Docker Engine on Ubuntu
The Ubuntu repositories include Docker, but the version lags behind. The official Docker repository ships the latest stable release. Install from there.
First, remove any old Docker packages that may conflict:
for pkg in docker.io docker-doc docker-compose docker-compose-v2 podman-docker containerd runc; do sudo apt-get remove $pkg; doneThen set up the Docker APT repository:

sudo apt-get update
sudo apt-get install ca-certificates curl
sudo install -m 0755 -d /etc/apt/keyrings
sudo curl -fsSL https://download.docker.com/linux/ubuntu/gpg -o /etc/apt/keyrings/docker.asc
sudo chmod a+r /etc/apt/keyrings/docker.asc

echo \
 "deb [arch=$(dpkg --print-architecture) signed-by=/etc/apt/keyrings/docker.asc] https://download.docker.com/linux/ubuntu \
 $(. /etc/os-release && echo "$VERSION_CODENAME") stable" | \
 sudo tee /etc/apt/sources.list.d/docker.list > /dev/null

sudo apt-get update
Now install Docker Engine, CLI, and Compose v2:
sudo apt-get install docker-ce docker-ce-cli containerd.io docker-buildx-plugin docker-compose-pluginAfter installation, verify it works:
sudo docker run hello-worldYou should see a welcome message confirming Docker is working. The hello-world container downloads a test image, runs it, prints output, and exits.
Also Read:

Post-Install: Running Docker Without Sudo
By default, Docker commands require sudo. To run as your regular user:
sudo usermod -aG docker $USERLog out and back in (or run newgrp docker) for the group change to take effect. Then test:
docker run hello-worldThis step is optional for single-user setups but essential if multiple developers need access to the Docker socket.
Securing Docker on a Production VPS
Stock Docker is not production-ready. The default configuration prioritizes convenience over security. Close these gaps before deploying real workloads.
Firewall: Docker and iptables
Docker manipulates iptables rules to expose container ports. If you run a firewall like UFW, Docker bypasses it by inserting rules directly into the FORWARD chain. The result: a container binding port 3306 publishes MySQL to the internet even if UFW blocks port 3306.
Fix this by telling Docker to leave iptables alone:
sudo mkdir -p /etc/docker
cat << 'EOF' | sudo tee /etc/docker/daemon.json
{
 "iptables": false
}
EOF
sudo systemctl restart docker
With iptables disabled in Docker, you manage firewall rules yourself. This is the safer approach for a VPS that runs other services outside containers.
Then set up UFW with explicit per-port rules:
sudo ufw default deny incoming
sudo ufw default allow outgoing
sudo ufw allow ssh
sudo ufw allow 80/tcp
sudo ufw allow 443/tcp
sudo ufw enable
For Portainer access (step below), add port 9443 to UFW and restrict it to your IP:
sudo ufw allow from YOUR_IP to any port 9443 proto tcpResource Limits and Log Rotation
An unbound container can eat all CPU and disk. Set global limits in daemon.json:
{
 "iptables": false,
 "log-driver": "json-file",
 "log-opts": {
 "max-size": "10m",
 "max-file": "3"
 },
 "default-ulimits": {
 "nofile": {
 "Name": "nofile",
 "Hard": 65536,
 "Soft": 65536
 }
 }
}
This caps container logs at 30 MB (three files of 10 MB each). Without this, a chatty container can fill your disk in hours.
Installing Portainer for Web-Based Container Management
Portainer gives you a browser dashboard to inspect containers, view logs, restart services, and deploy stacks. It replaces 80 percent of the Docker CLI commands you run daily.
Deploy Portainer Server as a single Docker container:
docker volume create portainer_data

docker run -d \
 --name portainer \
 --restart always \
 -p 9443:9443 \
 -v /var/run/docker.sock:/var/run/docker.sock \
 -v portainer_data:/data \
 portainer/portainer-ce:lts
Two volumes are mounted here. The Docker socket (/var/run/docker.sock) gives Portainer read-write access to the Docker daemon. The portainer_data volume stores configuration, so data survives container restarts and updates.
Access the dashboard at https://YOUR_VPS_IP:9443. The first visit prompts you to create an admin user. Choose a strong password. Portainer generates a self-signed SSL certificate by default. For production, replace it with a Let's Encrypt certificate or put Portainer behind a reverse proxy.
Portainer Initial Setup: What to Configure First
After logging in, Portainer shows you the local environment. It automatically detected the Docker socket and connected to the local engine. Three things to configure immediately:
- Set up monitoring: Go to Settings, enable Prometheus metrics. Portainer exposes container-level CPU, memory, and network stats on a built-in dashboard.
- Create a non-admin user: Portainer supports team-based access control. Create a restricted user for developers who need to view logs but should not delete containers.
- Set up backups: Export the Portainer configuration daily. The backup file is a one-megabyte JSON archive that lets you restore the entire setup on a fresh server.
Portainer also provides a Stacks feature similar to Docker Compose. You paste a compose.yaml definition into the web editor, and Portainer deploys it as a stack. This eliminates the need to SCP files to the server for every deployment.
Docker Compose: From Local to Production
Running docker run for every container works during testing but becomes unmanageable once you run multiple services. Docker Compose defines everything in a single YAML file.
Here is a production-ready compose.yaml for a typical web application stack. Save it to your VPS and run docker compose up -d:
services:
 app:
 image: your-app:latest
 restart: always
 ports:
 - "127.0.0.1:3000:3000"
 environment:
 - NODE_ENV=production
 - DATABASE_URL=postgres://user:pass@db:5432/app
 depends_on:
 db:
 condition: service_healthy
 healthcheck:
 test: ["CMD", "curl", "-f", "http://localhost:3000/health"]
 interval: 30s
 timeout: 10s
 retries: 3
 deploy:
 resources:
 limits:
 memory: 512M

 db:
 image: postgres:16-alpine
 restart: always
 volumes:
 - pgdata:/var/lib/postgresql/data
 environment:
 - POSTGRES_PASSWORD_FILE=/run/secrets/db_password
 secrets:
 - db_password
 healthcheck:
 test: ["CMD-SHELL", "pg_isready -U app"]
 interval: 10s
 timeout: 5s
 retries: 5

 nginx:
 image: nginx:alpine
 restart: always
 ports:
 - "80:80"
 - "443:443"
 volumes:
 - ./nginx.conf:/etc/nginx/conf.d/default.conf:ro
 - ./ssl:/etc/nginx/ssl:ro
 depends_on:
 - app

volumes:
 pgdata:

secrets:
 db_password:
 file: ./secrets/db_password.txt
Key production patterns in this file:
- Restart policy:
restart: alwaysensures containers restart after crashes or server reboots. - Health checks: Docker stops routing traffic to unhealthy containers when used with a reverse proxy.
- Resource limits: 512 MB memory cap prevents a memory leak in the app from crashing the database.
- Secrets: Database passwords are mounted as files, not environment variables. This reduces the risk of secrets leaking through
docker inspect. - Internal networking: The app connects to the database via the service name (
db), not an IP address. Docker DNS resolves it automatically.
Automating Container Updates with Watchtower
Running containers with pinned tags means you never get security updates until you manually pull and restart. Watchtower automates this. It runs as a container, checks for updated images on a schedule, and restarts containers with new versions.
docker run -d \
 --name watchtower \
 --restart always \
 -v /var/run/docker.sock:/var/run/docker.sock \
 containrrr/watchtower \
 --schedule "0 0 3 * * *" \
 --cleanup \
 --include-restarting
This runs Watchtower daily at 3 AM. The --cleanup flag removes old images after updates. Without it, your disk fills with superseded image layers.
Watchtower is aggressive. It restarts any running container with a newer image. If you want selective updates, tag containers you want to skip:
docker run -d \
 --label=com.centurylinklabs.watchtower.enable=false \
 your-image
Or run Watchtower with a whitelist:
--watchtower --only-once app dbCommon Pitfalls and How to Avoid Them
| Pitfall | Symptom | Fix |
|---|---|---|
| Container exits immediately | docker ps shows nothing | Run docker logs <name> to see the error. Often a missing env variable or wrong command. |
| Disk full from logs | Container runs but docker logs shows nothing | Set max-size: 10m in daemon.json. Prune with docker system prune weekly via cron. |
| Postgres auth fails on restart | Container restarts with fresh database | Mount a named volume, not a bind mount. Check permissions on the volume directory. |
| Port conflict | Error: port is already allocated | Run ss -tulpn | grep :PORT to find the process. Stop it or change the host port. |
| DNS resolution fails in container | apt-get update hangs in Dockerfile | Set dns: 8.8.8.8 in daemon.json or /etc/docker/daemon.json. |
| Permission denied writing to volume | App container can't write to bind mount | Container user ID does not match host user. Use user: 1000:1000 in compose or fix the directory ownership. |
Key Takeaways
Setting up Docker on a VPS removes the PaaS premium without adding unreasonable complexity. The core stack: Docker Engine, Compose, and Portainer: covers the full lifecycle from deployment to monitoring.
The setup process breaks down to five steps: install Docker Engine from the official repository, apply production security settings (disable Docker iptables management, set log limits), deploy Portainer as a management dashboard, write Compose files with health checks and resource limits, and automate updates with Watchtower.
Start with one containerized service and add complexity as you go. A reverse proxy (Nginx or Caddy) and a Postgres database with persistent volumes are all you need to run most web applications. Portainer shows you the logs and resource usage at a glance. Watchtower keeps images current without manual intervention.
Docker on a VPS is not zero-maintenance. But it is predictable. Fifteen minutes of setup saves paying two to three times more for an equivalent PaaS tier, with full control over every layer of the stack.

Irfan is a Creative Tech Strategist and the founder of Grafisify. He spends his days testing the latest AI design tools and breaking down complex tech into actionable guides for creators. When he’s not writing, he’s experimenting with generative art or optimizing digital workflows.
You might also like





 Artificial Intelligent
 Design & Creative
 Freelance
 Gadgets & Gear
 Insights
 Laptop
 Reviews
 Smartphone
 Tech Guides
 Vibe Coding