Quick Verdict: Caddy replaces complex Nginx configurations with a clean, readable syntax and built-in automatic HTTPS via Let’s Encrypt. For production servers, Caddy handles TLS certificate issuance, renewal, and HTTP-to-HTTPS redirection out of the box without requiring external scripts like Certbot.
Setting up web servers historically meant managing separate software layers. You installed Nginx or Apache, configured site blocks, then installed Certbot or ACME scripts to manage SSL certificates through cron jobs. Caddy changes this architecture by building automatic TLS certificate management directly into the core web server engine.
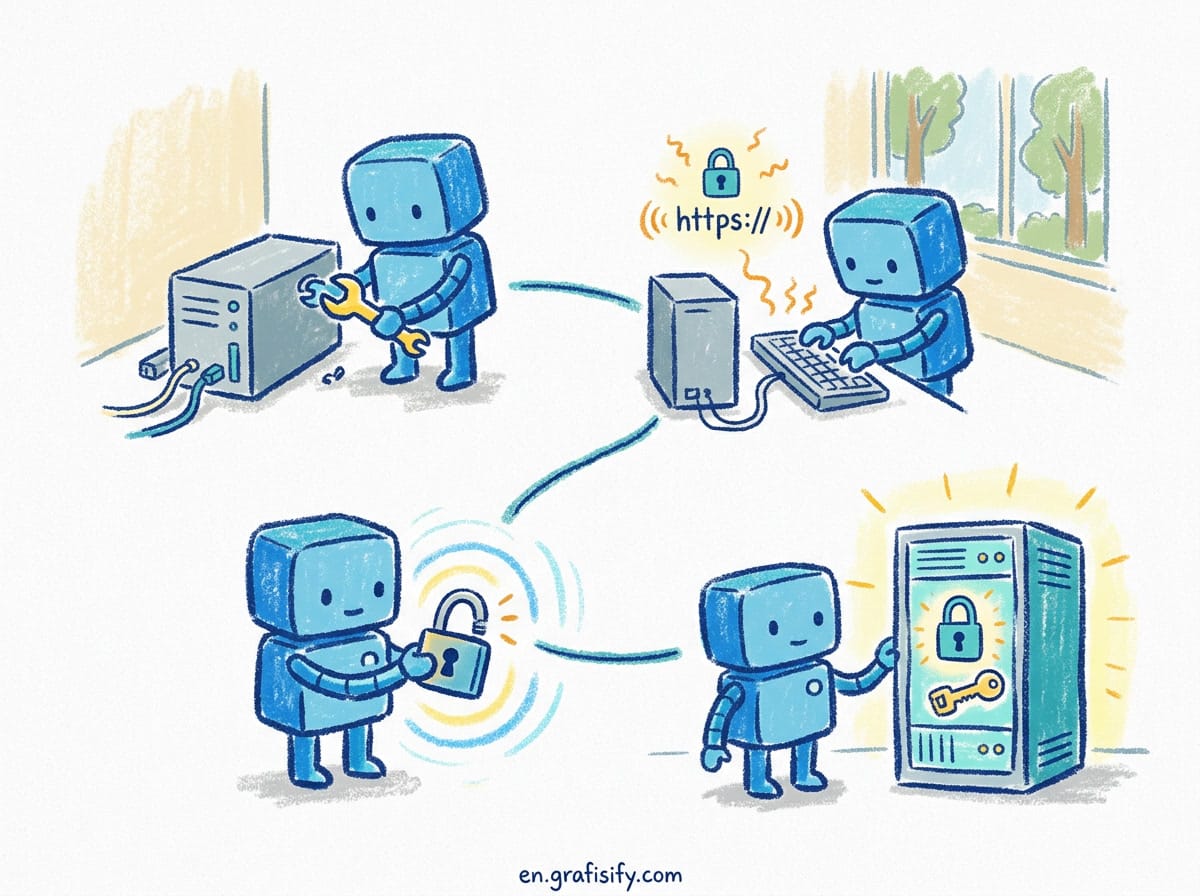
When you point a domain name to a server running Caddy, the web server contacts Let’s Encrypt or ZeroSSL, completes the ACME challenge, obtains a TLS certificate, and configures HTTPS listeners automatically. In this guide, I focus on the Linux systemd installation path because that is what most production servers run. I also assume you have a registered domain name, DNS access, and control over ports 80 and 443 on your host. I use Ubuntu 24.04 LTS for all examples here, but the commands translate to Debian or RHEL without changes.
Why Developers Are Replacing Nginx with Caddy
Nginx remains a powerful web server, but its configuration syntax reflects its age. Setting up a reverse proxy with TLS termination in Nginx requires dozens of lines of configuration across multiple files. You need separate server blocks for port 80 and port 443, explicit SSL certificate paths, cipher suite definitions, and redirection rules.

Caddy reduces that entire setup to two lines in a single configuration file called a Caddyfile. Caddy handles TLS handshakes, HTTP/2 and HTTP/3 protocol negotiation, OCSP stapling, and certificate renewals without additional plugins or background tasks.
| Feature | Nginx + Certbot | Caddy Web Server |
|---|---|---|
| HTTPS Setup | Manual (Certbot command + cron) | Automatic by default |
| Configuration Syntax | Verbose C-style directive blocks | Clean human-readable directives |
| HTTP/3 Support | Requires custom build or manual setup | Enabled out of the box |
| Config Reloads | nginx -s reload | caddy reload (zero downtime) |
| API Management | Limited third-party modules | Built-in REST API on port 2019 |
For modern containerized applications and microservices, Caddy eliminates administrative overhead while enforcing strong security defaults.
Step 1: Installing Caddy on Linux
Installing Caddy using official package repositories ensures your system receives automatic security updates. The installation process registers Caddy as a systemd service that starts automatically on boot.

For Debian and Ubuntu systems, run the following commands to add the official Caddy repository:
sudo apt install -y debian-keyring debian-archive-keyring apt-transport-https curl
curl -1sLf 'https://dl.cloudsmith.io/public/caddy/stable/gpg.key' | sudo gpg --dearmor -o /usr/share/keyrings/caddy-stable-archive-keyring.gpg
curl -1sLf 'https://dl.cloudsmith.io/public/caddy/stable/debian.deb.txt' | sudo tee /etc/apt/sources.list.d/caddy-stable.list
sudo apt update
sudo apt install caddy
For Fedora, RedHat, or CentOS systems, use the DNF package manager:
dnf install 'dnf-command(copr)'
dnf copr enable @caddy/caddy
dnf install caddy
Once installed, enable Caddy to start on boot and launch the service:
sudo systemctl enable --now caddy
systemctl status caddy
Before proceeding, ensure your server firewall allows incoming connections on port 80 (HTTP) and port 443 (HTTPS). If you use UFW on Ubuntu, run sudo ufw allow proto tcp from any to any port 80,443 to open those ports.

Step 2: Understanding the Caddyfile Structure
The main configuration file for Caddy is located at /etc/caddy/Caddyfile. Caddy reads this file when starting up or reloading configuration.
A standard Caddyfile consists of global option blocks and site blocks. Site blocks start with the domain name or IP address you want to serve, followed by directives enclosed in curly braces.
Here is an example of a static file server configuration:
example.com {
    root * /var/www/html
    file_server
    encode gzip zstd
}
In this block:
example.comtells Caddy which domain to match. Because this is a domain name, Caddy triggers automatic HTTPS immediately.root * /var/www/htmlsets the root directory for static files.file_serverenables the static file serving module.encode gzip zstdenables transparent response compression using Gzip and Zstandard.
Validate your Caddyfile syntax before applying changes. The caddy validate command checks the file for syntax errors, while caddy adapt prints the underlying JSON configuration that Caddy generates from your Caddyfile. Both commands help you catch mistakes before a live reload.
If you want to manage background services like Docker containers, read our guide on self-hosting applications with Docker Compose to see how backend applications pair with web servers.
Step 3: Setting Up a Reverse Proxy
The most frequent use case for Caddy in production is acting as a reverse proxy in front of backend applications written in Node.js, Python, Go, or running inside Docker containers.
Suppose you have a web application running locally on port 8080. To expose this application securely on app.example.com, edit /etc/caddy/Caddyfile:
app.example.com {
    reverse_proxy 127.0.0.1:8080
}
That single block accomplishes four tasks:
- Caddy listens on port 80 and port 443 for requests to
app.example.com. - Caddy provisions a public TLS certificate from Let’s Encrypt for
app.example.com. - Caddy redirects all unencrypted HTTP traffic on port 80 to HTTPS on port 443.
- Caddy proxies requests to your backend service at
127.0.0.1:8080, passing standard headers likeX-Forwarded-ForandX-Forwarded-Proto.
To apply changes without dropping active connections, run:
sudo caddy reload --config /etc/caddy/CaddyfileIf your architecture uses containers, you can also review our workflow for running isolated container environments to isolate backends behind your reverse proxy layer.
Step 4: How Caddy Automatic HTTPS Works under the Hood
Automatic HTTPS in Caddy operates through an integrated ACME client. When Caddy detects a hostname in your Caddyfile, it executes an automated certificate acquisition process.
- Domain Matching: Caddy identifies that
app.example.comrequires a public TLS certificate. - ACME Challenge: Caddy initiates an HTTP-01 challenge with Let’s Encrypt or ZeroSSL. It answers the verification request on port 80 automatically.
- Certificate Issuance: Upon successful verification, the Certificate Authority issues the certificate. Caddy stores keys securely in
/var/lib/caddy/.local/share/caddy/. - Automated Renewal: Caddy monitors certificate expiration dates and renews certificates automatically when they reach 30 days remaining validity.
If you test configurations on local environments without a public domain name, Caddy detects addresses like localhost or app.localhost and provisions certificates using an internal Certificate Authority instead. For details on official installation packages, visit the official Caddy installation documentation.
Step 5: Advanced Caddyfile Configurations for Production
Production deployments often require path routing, header security, and access controls. Caddy handles these requirements using request matchers and directives.
Path Matching and Routing
You can route specific paths to different backends while serving static assets for everything else:
api.example.com {
    # Proxy API traffic to Node backend
    reverse_proxy /api/* 127.0.0.1:3000

    # Serve static assets for all other routes
    root * /var/www/frontend
    file_server
}
Adding Security Headers
Protecting applications against cross-site scripting and framing attacks requires response headers. You can apply headers using the header directive:
example.com {
    reverse_proxy 127.0.0.1:8080

    header {
        Strict-Transport-Security "max-age=31536000; includeSubDomains; preload"
        X-Content-Type-Options "nosniff"
        X-Frame-Options "DENY"
        Referrer-Policy "strict-origin-when-cross-origin"
    }
}
When running command-line tools and web utilities, inspect our guide on scripting CLI workflows to build automated server maintenance tools.
For complex deployments requiring detailed reverse proxy options, refer to the Caddy reverse proxy directive documentation.
Managing Multiple Sites on One Server
Caddy scales from a single domain to dozens of sites without changing your workflow. Add one site block per domain in the same Caddyfile, and Caddy provisions a separate certificate for each hostname it finds.
example.com {
    root * /var/www/main
    file_server
}

blog.example.com {
    reverse_proxy 127.0.0.1:8080
}

api.example.com {
    reverse_proxy 127.0.0.1:3000
}
Every block triggers its own automatic HTTPS process, so certificate issuance and renewal stay independent per site. If you manage many subdomains, define *.example.com as a site address to obtain a single wildcard certificate instead of one certificate per subdomain. Wildcard certificates require DNS-01 challenge verification, which needs a DNS provider plugin compiled into your Caddy binary.
For teams that frequently modify routing rules, Caddy exposes a REST API on port 2019. You can push JSON configuration changes with a single curl request and Caddy applies them with zero downtime, which fits cleanly into deployment pipelines.
Troubleshooting Common Caddy Issues
While Caddy requires minimal configuration, network settings can occasionally prevent certificate issuance or proxy routing.
1. ACME HTTP Challenge Failed
If Caddy fails to obtain a certificate, check that your DNS A record points directly to your server’s public IP address. Also confirm that port 80 is not blocked by external firewalls or cloud security groups. Let’s Encrypt must reach port 80 to complete the HTTP-01 challenge.
2. Permission Denied on Ports 80 and 443
When running Caddy manually as an unprivileged user, Linux blocks binding to ports below 1024. Use the systemd service to run Caddy, or grant Caddy permission to bind to low ports using setcap:
sudo setcap cap_net_bind_service=+ep $(which caddy)3. Checking Caddy Logs
To inspect real-time log output and debug TLS handshakes or routing errors, use journalctl:
sudo journalctl -u caddy -f --no-pagerYou can review full certificate workflows in the Caddy automatic HTTPS guide and the official Caddyfile tutorial for detailed syntax references.
Conclusion: Modernizing Web Server Infrastructure
Caddy simplifies web server management by making security the default standard rather than an afterthought. Eliminating manual SSL certificate setup, cron renewals, and verbose configuration files reduces potential configuration errors on production infrastructure.
Whether you host static websites, microservices, or complex Docker applications, transitioning to Caddy provides automated TLS, HTTP/3 support, and modern API-driven management in a single lightweight binary.




 Artificial Intelligent
 Design & Creative
 Freelance
 Gadgets & Gear
 Insights
 Laptop
 Reviews
 Smartphone
 Tech Guides
 Vibe Coding