How to Deploy Coolify on VPS: Complete Setup Guide
Verdict Cepat
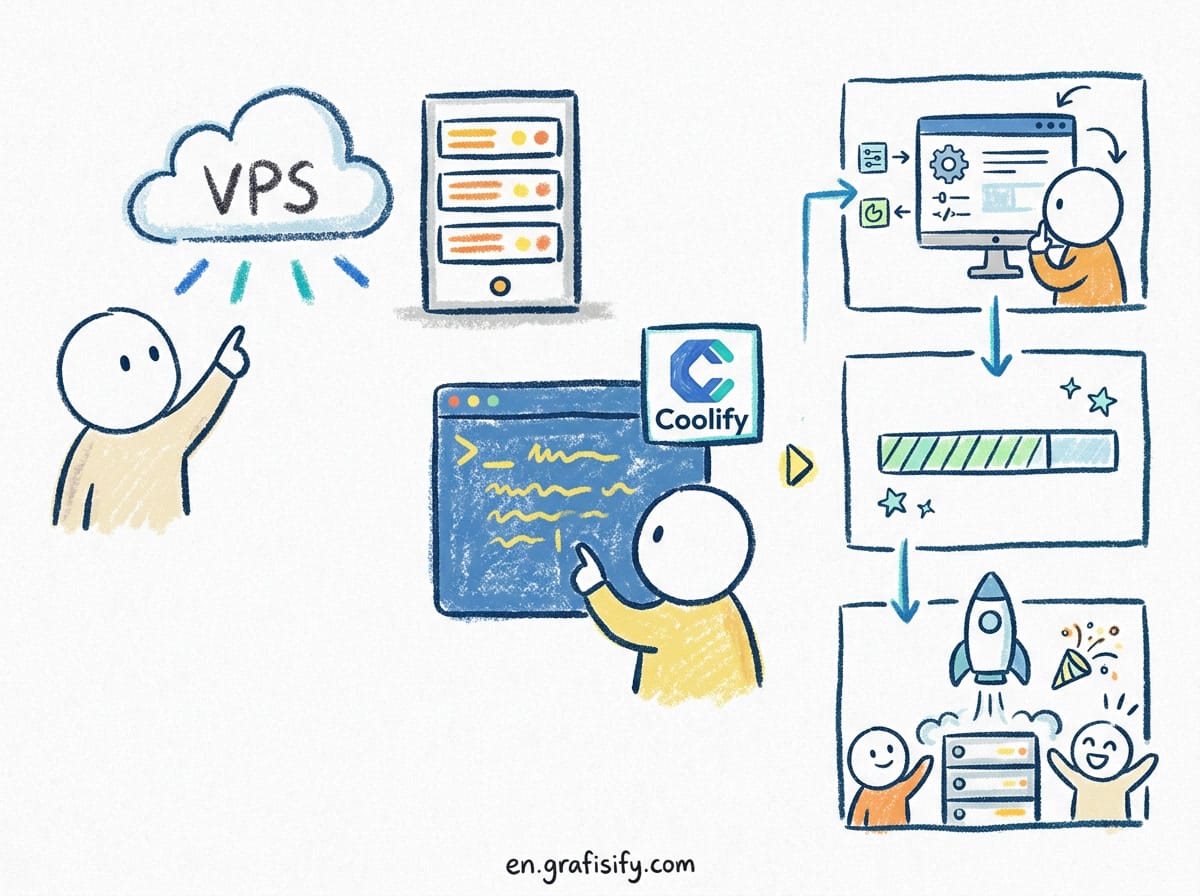
If you want the flexibility of Heroku or Vercel without paying monthly per-app pricing or surrendering control of your infrastructure, Coolify is currently the best open-source self-hosted PaaS available. It turns any bare $5/month VPS into a modern cloud platform with automatic Git deployments, free Let’s Encrypt SSL certificates, automated database backups, and one-click software provisioning. While it requires basic terminal familiarity to install Docker, the daily developer experience completely removes server management friction for freelancers and small engineering teams.
I have spent years managing self-hosted infrastructure for client projects and internal tools, moving from raw Docker Compose files to Portainer and eventually to dedicated PaaS solutions. Coolify sits right in the sweet spot: in my personal opinion, it gives you the speed of modern cloud platforms while keeping 100% of your data on your own virtual private server.

What Is Coolify and Why Should You Self-Host It?
Coolify is an open-source, self-hosted Platform as a Service (PaaS) designed as an alternative to commercial services like Heroku, Render, Vercel, and Railway. Built on top of Docker and Traefik, Coolify provides an intuitive web interface to build, deploy, and manage web applications, static sites, databases, and over 280 pre-configured open-source services.
Also Read:

When you deploy applications on commercial PaaS providers, you pay a heavy premium for developer convenience. A modest setup containing two Node.js microservices, a PostgreSQL database, and a Redis cache can easily cost $60 to $120 per month on services like Heroku or Railway. Running that exact same stack via Coolify on a $10/month Hetzner or DigitalOcean VPS yields identical performance at a fraction of the operating cost.
Key advantages of choosing Coolify for your infrastructure setup include:
- Zero Vendor Lock-In: All your application settings and persistent data remain on your VPS. If you ever stop using Coolify, your underlying Docker containers continue running independently.
- Automated SSL Renewal: Automatic domain routing and HTTPS provisioning via built-in Traefik reverse proxy integration.
- Native Git Deployments: Automatic build triggers on continuous integration commits and pull request preview environments via GitHub, GitLab, and Bitbucket integration.
- Multi-Server Management: Control multiple VPS instances across different cloud providers from a single centralized Coolify dashboard.
Coolify vs Portainer vs Vercel: Feature Comparison
To understand where Coolify fits into your tech stack, it helps to compare it directly against container management tools like Portainer and proprietary cloud platforms like Vercel.

| Feature | Coolify (Self-Hosted) | Portainer | Vercel / Heroku |
|---|---|---|---|
| Monthly Base Cost | Server cost only ($5 to $10/mo) | Server cost only ($5 to $10/mo) | $20+/user + bandwidth scale |
| Git Push Deployments | Yes (Native Git webhooks) | Manual / CI pipeline required | Yes (Native) |
| Automatic SSL (HTTPS) | Yes (Automatic via Traefik) | Manual reverse proxy setup | Yes (Automatic) |
| One-Click Service Store | Yes (280+ templates) | Limited App Templates | No (Managed Add-ons) |
| Database Automated S3 Backups | Yes (Built-in) | Manual volume scripting | Paid tier feature |
| Data Privacy & Control | 100% Full ownership | 100% Full ownership | Third-party infrastructure |
Prerequisites for Installing Coolify
Before launching the installation command, ensure your VPS meets the basic system requirements. Coolify is lightweight, but container builds require temporary CPU and RAM overhead.
- Operating System: Ubuntu 22.04 LTS or Ubuntu 24.04 LTS (64-bit) recommended. Debian 12 is also supported.
- Minimum Hardware: 2 vCPU cores, 2 GB RAM, and 30 GB SSD storage. (For light workloads, 1 GB RAM with a 2 GB swap file works).
- Network Ports: Open incoming ports
80(HTTP),443(HTTPS), and22(SSH) in your VPS firewall. - Domain Name: A custom domain with an A Record pointing to your server IP address (e.g.,
coolify.yourdomain.com).

Step 1: Preparing Your VPS Environment
First, log into your fresh server via SSH as the root user:

ssh root@YOUR_SERVER_IPUpdate your system package index and upgrade existing packages to their latest security releases to prevent installation conflicts:
sudo apt update && sudo apt upgrade -yIf your VPS provider enables a default firewall like UFW, ensure essential web traffic ports are accessible before proceeding:
sudo ufw allow 22/tcp
sudo ufw allow 80/tcp
sudo ufw allow 443/tcp
sudo ufw enable
Step 2: Installing Coolify with One Command
The Coolify team provides an official installation script that automatically detects your OS, installs Docker Engine, configures network bridges, and provisions the initial Coolify stack containers.

Run the single-line installer command in your server terminal:
curl -fsSL https://cdn.coollabs.io/coolify/install.sh | bashThe installation process typically takes between 2 to 5 minutes depending on your VPS network bandwidth. During execution, the script performs the following tasks automatically:
- Installs Docker and Docker Compose plugin if missing.
- Sets up the background Traefik reverse proxy.
- Pulls the official Coolify application images from Docker Hub.
- Launches the primary Coolify dashboard service on port
8000.
Once finished, your terminal will display a completion message containing the direct IP URL to access your initial dashboard (e.g., http://YOUR_SERVER_IP:8000).
Step 3: Initial Dashboard Configuration and Security
Open your browser and navigate to http://YOUR_SERVER_IP:8000. You will be greeted by the initial registration screen.
- Create Root Account: Enter your admin email address and a high-entropy password. The first account created automatically becomes the system superadmin.
- Configure System Domain: Navigate to Keys & Servers > Localhost > Settings. Under the domain setting, enter your dedicated subdomain (e.g.,
https://coolify.yourdomain.com). - Enable Automatic SSL: Coolify automatically communicates with Let’s Encrypt through Traefik to obtain a valid SSL certificate for your dashboard domain.
I recommend setting up two-factor authentication (2FA) immediately inside your user account profile settings to secure administrative SSH access keys saved on the server.
If you’re upgrading your general server infrastructure, check out our guide on How to Set Up Docker on a VPS and Manage Containers with Portainer to compare container workflows. For developers managing multiple self-hosted tools, our breakdown on Open WebUI vs LibreChat offers great insights into running modern AI web interfaces self-hosted.
Step 4: Deploying Your First Web Application
Deploying a web application on Coolify takes less than two minutes thanks to auto-detection engines like Nixpacks and Railpack. In my experience, this feature alone saves hours during initial setup.
Connecting GitHub for Automated CI/CD
To enable automatic deployments when pushing code to your repository:
- Navigate to Sources > Add New Source > GitHub App.
- Click Register GitHub App. Coolify will automatically redirect you to GitHub to authorize repository permissions.
- Select specific repositories or grant access to your entire GitHub organization.
Creating a New Resource
Once your Git source is linked, adding a new web service is straightforward:
- Click Projects > Default Project > Production Environment.
- Click + Add New Resource and select Public / Private Repository.
- Choose your target repository and select your deployment branch (e.g.,
main). - Specify your application domain (e.g.,
https://app.yourdomain.com). - Add necessary environment variables (such as
DATABASE_URLor secret keys) in the variable panel. - Click Deploy.
Coolify will clone your repository, detect your application language (Node.js, Python, Go, Laravel, or Rust), build the Docker image, assign routing domains, and start the application container seamlessly.
Step 5: Provisioning Databases with Automated S3 Backups
Production applications rely on stable database storage. Coolify supports one-click provisioning for PostgreSQL, MySQL, MariaDB, MongoDB, Redis, and ClickHouse.
To provision a production database:
- Inside your project workspace, click + Add New Resource > Databases.
- Select PostgreSQL (or your database engine of choice).
- Specify container memory limits, database name, master user, and password.
- Keep the database internal to the Coolify Docker network for maximum security, or expose a public port if external client connections are required.
Setting Up Scheduled Backups to AWS S3 / Cloudflare R2
Never run production databases without offsite backups. Coolify makes automated backups effortless:
- Open your database resource settings and select the Backups tab.
- Enable Scheduled Backups and define a Cron pattern (e.g.,
0 2 * * *for daily 2:00 AM backups). - Provide your S3-compatible storage credentials (works with AWS S3, Cloudflare R2, DigitalOcean Spaces, or MinIO).
- Click Save Backup Configuration.
If you’re evaluating overall developer workflows and tool selection, our detailed guide on Vibe Coding Tool Decision Framework can help you choose the right developer setup. Additionally, if you need reliable external infrastructure, consider review specs in our How to Choose a Laptop for Programming guide.
Essential Maintenance and Backup Strategies
Although Coolify automates server maintenance, keeping your host system healthy requires periodic checks:
- Updating Coolify: When a new update is released, a notification banner appears in your dashboard. You can update with a single click, or run
curl -fsSL https://cdn.coollabs.io/coolify/install.sh | bashvia SSH. - Pruning Docker Images: Old build layers can fill up your server disk over time. Coolify includes an automated Docker cleanup utility under Settings > Auto Cleanup to prune unused containers and unused build caches.
- Monitoring Resource Usage: Keep track of server CPU and RAM metrics within the dashboard server settings tab to scale your VPS size before hitting memory capacity limits.
Troubleshooting Common Coolify Issues
If you run into issues during deployment, here are quick solutions to common errors:
- Bad Gateway (502 Error): This occurs when your application container is running but not listening on the port configured in Coolify. Verify your application environment variable
PORTmatches the internal container port setting in Coolify settings. - Let’s Encrypt SSL Failures: Check that your DNS A Record is fully propagated to your VPS IP address and that ports
80and443are not blocked by cloud provider security groups. - Server Out of Memory During Builds: Docker builds for complex frameworks (like Next.js or Rust) can consume substantial memory. Enable a 2 GB to 4 GB Linux swap file on your server to prevent out-of-memory errors during build phases.
Kesimpulan
Self-hosting your app infrastructure with Coolify offers an ideal balance of cost savings, data sovereignty, and developer efficiency. By deploying Coolify on an affordable VPS, you unlock full Vercel-like automated Git deployments, automatic SSL certificates, and managed database backups without recurring cloud platform fees. Whether you are running client staging sites, personal SaaS projects, or open-source tools, mastering Coolify turns raw cloud hardware into a high-performance personal cloud platform. For official installation guides and complete command documentation, visit coolify.io and check official repository sources on GitHub, Docker Engine Docs, and Hetzner Cloud.

Irfan is a Creative Tech Strategist and the founder of Grafisify. He spends his days testing the latest AI design tools and breaking down complex tech into actionable guides for creators. When he’s not writing, he’s experimenting with generative art or optimizing digital workflows.






 Artificial Intelligent
 Design & Creative
 Freelance
 Gadgets & Gear
 Insights
 Laptop
 Reviews
 Smartphone
 Tech Guides
 Vibe Coding